一、Web环境搭建部署Zabbix时,选择合适的MariaDB、PHP和Nginx版本非常重要,以确保兼容性和最佳性能。以下是建议版本:Zabbix 6.4
MariaDB:官方文档推荐使用MariaDB 10.3或更高版本。对于CentOS Stream 9,建议使用MariaDB 10.5或更新版本。
PHP:Zabbix 6.4支持PHP 8.0或更高版本。根据您的需求,可以选择安装PHP 8.0、8.1或8.2。请注意,PHP 8.3虽然也可能是可用的,但在撰写本文时可能尚未被所有官方渠道支持。
Nginx:官方文档中提到Nginx 1.18或更高版本是兼容的。对于CentOS Stream 9,默认提供的Nginx版本应该满足要求。1、切换CentOS -stream-9源为阿里源
备份原有的yum源文件,以便需要时恢复:sudo mv /etc/yum.repos.d/CentOS-* /tmp/
centos.repo[baseos]
name=CentOS Stream $releasever - BaseOS
baseurl=https://mirrors.aliyun.com/centos-stream/$stream/BaseOS/$basearch/os/
gpgkey=file:///etc/pki/rpm-gpg/RPM-GPG-KEY-centosofficial
gpgcheck=1
repo_gpgcheck=0
metadata_expire=6h
countme=1
enabled=1[baseos-debug]
name=CentOS Stream $releasever - BaseOS - Debug
baseurl=https://mirrors.aliyun.com/centos-stream/$stream/BaseOS/$basearch/debug/tree/
gpgkey=file:///etc/pki/rpm-gpg/RPM-GPG-KEY-centosofficial
gpgcheck=1
repo_gpgcheck=0
metadata_expire=6h
enabled=0[baseos-source]
name=CentOS Stream $releasever - BaseOS - Source
baseurl=https://mirrors.aliyun.com/centos-stream/$stream/BaseOS/source/tree/
gpgkey=file:///etc/pki/rpm-gpg/RPM-GPG-KEY-centosofficial
gpgcheck=1
repo_gpgcheck=0
metadata_expire=6h
enabled=0[appstream]
name=CentOS Stream $releasever - AppStream
baseurl=https://mirrors.aliyun.com/centos-stream/$stream/AppStream/$basearch/os/
gpgkey=file:///etc/pki/rpm-gpg/RPM-GPG-KEY-centosofficial
gpgcheck=1
repo_gpgcheck=0
metadata_expire=6h
countme=1
enabled=1[appstream-debug]
name=CentOS Stream $releasever - AppStream - Debug
baseurl=https://mirrors.aliyun.com/centos-stream/$stream/AppStream/$basearch/debug/tree/
gpgkey=file:///etc/pki/rpm-gpg/RPM-GPG-KEY-centosofficial
gpgcheck=1
repo_gpgcheck=0
metadata_expire=6h
enabled=0[appstream-source]
name=CentOS Stream $releasever - AppStream - Source
baseurl=https://mirrors.aliyun.com/centos-stream/$stream/AppStream/$basearch/debug/tree/
gpgkey=file:///etc/pki/rpm-gpg/RPM-GPG-KEY-centosofficial
gpgcheck=1
repo_gpgcheck=0
metadata_expire=6h
enabled=0[crb]
name=CentOS Stream $releasever - CRB
baseurl=https://mirrors.aliyun.com/centos-stream/$stream/CRB/$basearch/os/
gpgkey=file:///etc/pki/rpm-gpg/RPM-GPG-KEY-centosofficial
gpgcheck=1
repo_gpgcheck=0
metadata_expire=6h
countme=1
enabled=0[crb-debug]
name=CentOS Stream $releasever - CRB - Debug
baseurl=https://mirrors.aliyun.com/centos-stream/$stream/CRB/$basearch/debug/tree/
gpgkey=file:///etc/pki/rpm-gpg/RPM-GPG-KEY-centosofficial
gpgcheck=1
repo_gpgcheck=0
metadata_expire=6h
enabled=0[crb-source]
name=CentOS Stream $releasever - CRB - Source
baseurl=https://mirrors.aliyun.com/centos-stream/$stream/CRB/source/tree/
gpgkey=file:///etc/pki/rpm-gpg/RPM-GPG-KEY-centosofficial
gpgcheck=1
repo_gpgcheck=0
metadata_expire=6h
enabled=0
centos-addons.repo
[highavailability]
name=CentOS Stream $releasever - HighAvailability
baseurl=http://mirrors.aliyun.com/centos-stream/$stream/HighAvailability/$basearch/os/
gpgkey=file:///etc/pki/rpm-gpg/RPM-GPG-KEY-centosofficial
gpgcheck=1
repo_gpgcheck=0
metadata_expire=6h
countme=1
enabled=0[highavailability-debug]
name=CentOS Stream $releasever - HighAvailability - Debug
baseurl=http://mirrors.aliyun.com/centos-stream/$stream/HighAvailability/$basearch/debug/tree/
gpgkey=file:///etc/pki/rpm-gpg/RPM-GPG-KEY-centosofficial
gpgcheck=1
repo_gpgcheck=0
metadata_expire=6h
enabled=0[highavailability-source]
name=CentOS Stream $releasever - HighAvailability - Source
baseurl=http://mirrors.aliyun.com/centos-stream/$stream/HighAvailability/source/tree/
gpgkey=file:///etc/pki/rpm-gpg/RPM-GPG-KEY-centosofficial
gpgcheck=1
repo_gpgcheck=0
metadata_expire=6h
enabled=0[nfv]
name=CentOS Stream $releasever - NFV
baseurl=http://mirrors.aliyun.com/centos-stream/$stream/NFV/$basearch/os/
gpgkey=file:///etc/pki/rpm-gpg/RPM-GPG-KEY-centosofficial
gpgcheck=1
repo_gpgcheck=0
metadata_expire=6h
countme=1
enabled=0[nfv-debug]
name=CentOS Stream $releasever - NFV - Debug
baseurl=http://mirrors.aliyun.com/centos-stream/$stream/NFV/$basearch/debug/tree/
gpgkey=file:///etc/pki/rpm-gpg/RPM-GPG-KEY-centosofficial
gpgcheck=1
repo_gpgcheck=0
metadata_expire=6h
enabled=0[nfv-source]
name=CentOS Stream $releasever - NFV - Source
baseurl=http://mirrors.aliyun.com/centos-stream/$stream/NFV/source/tree/
gpgkey=file:///etc/pki/rpm-gpg/RPM-GPG-KEY-centosofficial
gpgcheck=1
repo_gpgcheck=0
metadata_expire=6h
enabled=0[rt]
name=CentOS Stream $releasever - RT
baseurl=http://mirrors.aliyun.com/centos-stream/$stream/RT/$basearch/os/
gpgkey=file:///etc/pki/rpm-gpg/RPM-GPG-KEY-centosofficial
gpgcheck=1
repo_gpgcheck=0
metadata_expire=6h
countme=1
enabled=0[rt-debug]
name=CentOS Stream $releasever - RT - Debug
baseurl=http://mirrors.aliyun.com/centos-stream/$stream/RT/$basearch/debug/tree/
gpgkey=file:///etc/pki/rpm-gpg/RPM-GPG-KEY-centosofficial
gpgcheck=1
repo_gpgcheck=0
metadata_expire=6h
enabled=0[rt-source]
name=CentOS Stream $releasever - RT - Source
baseurl=http://mirrors.aliyun.com/centos-stream/$stream/RT/source/tree/
gpgkey=file:///etc/pki/rpm-gpg/RPM-GPG-KEY-centosofficial
gpgcheck=1
repo_gpgcheck=0
metadata_expire=6h
enabled=0[resilientstorage]
name=CentOS Stream $releasever - ResilientStorage
baseurl=http://mirrors.aliyun.com/centos-stream/$stream/ResilientStorage/$basearch/os/
gpgkey=file:///etc/pki/rpm-gpg/RPM-GPG-KEY-centosofficial
gpgcheck=1
repo_gpgcheck=0
metadata_expire=6h
countme=1
enabled=0[resilientstorage-debug]
name=CentOS Stream $releasever - ResilientStorage - Debug
baseurl=http://mirrors.aliyun.com/centos-stream/$stream/ResilientStorage/$basearch/debug/tree/
gpgkey=file:///etc/pki/rpm-gpg/RPM-GPG-KEY-centosofficial
gpgcheck=1
repo_gpgcheck=0
metadata_expire=6h
enabled=0[resilientstorage-source]
name=CentOS Stream $releasever - ResilientStorage - Source
baseurl=http://mirrors.aliyun.com/centos-stream/$stream/ResilientStorage/source/tree/
gpgkey=file:///etc/pki/rpm-gpg/RPM-GPG-KEY-centosofficial
gpgcheck=1
repo_gpgcheck=0
metadata_expire=6h
enabled=0[extras-common]
name=CentOS Stream $releasever - Extras packages
baseurl=http://mirrors.aliyun.com/centos-stream/SIGs/$stream/extras/$basearch/extras-common/
gpgkey=file:///etc/pki/rpm-gpg/RPM-GPG-KEY-CentOS-SIG-Extras-SHA512
gpgcheck=1
repo_gpgcheck=0
metadata_expire=6h
countme=1
enabled=1[extras-common-source]
name=CentOS Stream $releasever - Extras packages - Source
baseurl=http://mirrors.aliyun.com/centos-stream/SIGs/$stream/extras/source/extras-common/
gpgkey=file:///etc/pki/rpm-gpg/RPM-GPG-KEY-CentOS-SIG-Extras-SHA512
gpgcheck=1
repo_gpgcheck=0
metadata_expire=6h
enabled=0
生成缓存并且更新源:yum clean all && yum makecacheyum -y update
2、关闭防火墙,SELINUX
# 关闭防火墙(临时关闭,系统重启后会开启)
systemctl stop firewalld
# 查看防火墙状态
systemctl status firewalld
# 重启系统后不开启防火墙
systemctl disable firewalldSELinux是一种强制访问控制的安全模块,它被集成到了Linux操作系统中;在SELinux下,所有进程和用户都必须明确获得执行特定操作的权限。# 查看selinux状态
getenforce
# 临时关闭selinux
setenforce 0
# 永久关闭selinux,将SELINUX=disabled
vim /etc/selinux/config3、web环境搭建(安装LNMP)
LAMP和LNMP是常见的web环境,它们具体代表如下:
L:linux,操作系统
A或N:Apache或Nginx,Web服务器软件
M:MariaDB或MySQL,数据库软件
P:PHP、Perl、Python,脚本软件
使用yum源,向系统安装MariaDB、PHP、hpptd或者nginx,并借助yum解决LAMP各组件间的依赖关系
yum -y install mariadb mariadb-server php php-mysqlnd nginx# 启动nginx
systemctl start nginx
# 设置开机自启
systemctl enable nginx# 启动mariadb
systemctl start mariadb
# 设置开机自启
systemctl enable mariadb # 查看nginx的版本,默认版本已经够用了
nginx -v
[root@localhost yum.repos.d]# nginx -v
nginx version: nginx/1.20.1# 查看php的版本
php -v[root@localhost yum.repos.d]# php -v
PHP 8.0.30 (cli) (built: Aug  3 2023 17:13:08) ( NTS gcc x86_64 )
Copyright (c) The PHP Group
Zend Engine v4.0.30, Copyright (c) Zend Technologieswith Zend OPcache v8.0.30, Copyright (c), by Zend Technologies# 查看mariadb版本,10.5.27
mysql -V 或者 mysql --version[root@localhost yum.repos.d]# mysql -V
mysql  Ver 15.1 Distrib 10.5.27-MariaDB, for Linux (x86_64) using  EditLine wrapper
4、测试nginx,输入地址:http://你的主机地址,看到ngin欢迎页面,说明测试成功

5、配置数据库
安全初始化数据库
[root@localhost yum.repos.d]# mysql_secure_installationNOTE: RUNNING ALL PARTS OF THIS SCRIPT IS RECOMMENDED FOR ALL MariaDBSERVERS IN PRODUCTION USE!  PLEASE READ EACH STEP CAREFULLY!In order to log into MariaDB to secure it, we'll need the current
password for the root user. If you've just installed MariaDB, and
haven't set the root password yet, you should just press enter here.
Enter current password for root (enter for none):
OK, successfully used password, moving on...
Setting the root password or using the unix_socket ensures that nobody
can log into the MariaDB root user without the proper authorisation.
You already have your root account protected, so you can safely answer 'n'.
## 改变使用Unix套接字文件来进行用户认证的方式 否
Switch to unix_socket authentication [Y/n] n... skipping.
You already have your root account protected, so you can safely answer 'n'.## 修改了root用户的密码,看个人需要 是
Change the root password? [Y/n] y
New password:
Re-enter new password:
Password updated successfully!
Reloading privilege tables..... Success!
By default, a MariaDB installation has an anonymous user, allowing anyone
to log into MariaDB without having to have a user account created for
them.  This is intended only for testing, and to make the installation
go a bit smoother.  You should remove them before moving into a
production environment.
## 是否移除匿名用户 是
Remove anonymous users? [Y/n] y... Success!
Normally, root should only be allowed to connect from 'localhost'.  This
ensures that someone cannot guess at the root password from the network.
## 不允许远程连接 否
Disallow root login remotely? [Y/n] n... skipping.
By default, MariaDB comes with a database named 'test' that anyone can
access.  This is also intended only for testing, and should be removed
before moving into a production environment.
## 是否删除测试用的数据库权限? 是
Remove test database and access to it? [Y/n] y- Dropping test database...... Success!- Removing privileges on test database...... Success!
Reloading the privilege tables will ensure that all changes made so far
will take effect immediately.
## 是否重新加载权限表  是
Reload privilege tables now? [Y/n] y... Success!
Cleaning up...
All done!  If you've completed all of the above steps, your MariaDB
installation should now be secure.Thanks for using MariaDB!
数据库安装并初始化完成
6、创建Zabbix数据库及用户
[root@localhost yum.repos.d]# mysql -u root -p
Enter password:
Welcome to the MariaDB monitor.  Commands end with ; or \g.
Your MariaDB connection id is 10
Server version: 10.5.27-MariaDB MariaDB ServerCopyright (c) 2000, 2018, Oracle, MariaDB Corporation Ab and others.Type 'help;' or '\h' for help. Type '\c' to clear the current input statement.
## 建zabbix库,并设定utf8字符集
MariaDB [(none)]> create database zabbix character set utf8mb4 collate utf8mb4_bin;
Query OK, 1 row affected (0.001 sec)
## 授权zabbix用户给zabbix库权限并修改密码
MariaDB [(none)]>grant all privileges on zabbix.* to zabbix@localhost identified by '123456';
Query OK, 0 rows affected (0.001 sec)
## 然后刷新权限以使更改生效
MariaDB [(none)]> FLUSH PRIVILEGES;
Query OK, 0 rows affected (0.001 sec)MariaDB [(none)]> exit
Bye
退出数据库,测试zabbix用户
[root@localhost yum.repos.d]# mysql -uzabbix -p123456
Welcome to the MariaDB monitor.  Commands end with ; or \g.
Your MariaDB connection id is 14
Server version: 10.5.27-MariaDB MariaDB ServerCopyright (c) 2000, 2018, Oracle, MariaDB Corporation Ab and others.Type 'help;' or '\h' for help. Type '\c' to clear the current input statement.
## 查看数据库
MariaDB [(none)]> show databases;
+--------------------+
| Database           |
+--------------------+
| information_schema |
| zabbix             |
+--------------------+
2 rows in set (0.001 sec)MariaDB [(none)]> exit
Bye
二、Server端安装配置
1、添加Zabbix官方仓库
yum -y install https://repo.zabbix.com/zabbix/6.4/rhel/9/x86_64/zabbix-release-6.4-1.el9.noarch.rpm
yum clean all && yum makecache
2、安装Zabbix Server、Web前端和Agent
yum -y install zabbix-server-mysql zabbix-web-mysql zabbix-apache-conf zabbix-sql-scripts zabbix-agent3、配置数据库
配置Zabbix Server连接到MariaDB: 编辑/etc/zabbix/zabbix_server.conf文件,设置数据库连接参数,如DBHost、DBName、DBUser和DBPassword。
zcat /usr/share/zabbix-sql-scripts/mysql/server.sql.gz | mysql --default-character-set=utf8mb4 -uzabbix -p zabbix
修改配置文件 ,添加DBPassword=123456
vim /etc/zabbix/zabbix_server.conf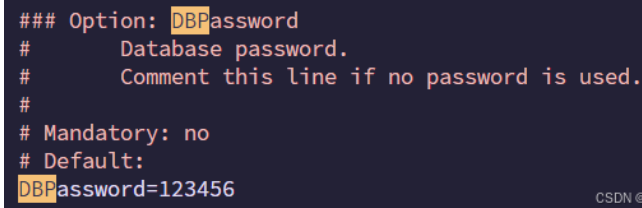
# 在文件的最后添加
NodeAddress=localhost:10051
AllowUnsupportedDBVersions=1
DBSocket=/var/lib/mysql/mysql.sock
更改时区vim /etc/php-fpm.d/zabbix.conf
php_value[date.timezone] = Asia/Shanghai # 有的话修改,没有的可以添加启动Zabbix Server和Agent,并设置开机自启systemctl restart zabbix-server zabbix-agent nginx php-fpm
systemctl enable zabbix-server zabbix-agent nginx php-fpm
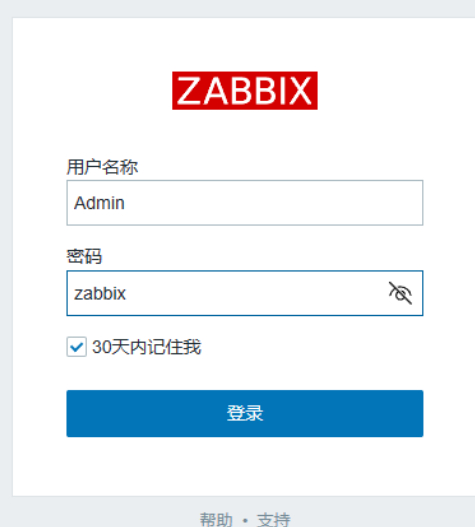
三、 Zabbix访问测试,http://你的地址/zabbix
访问过程中出现的问题
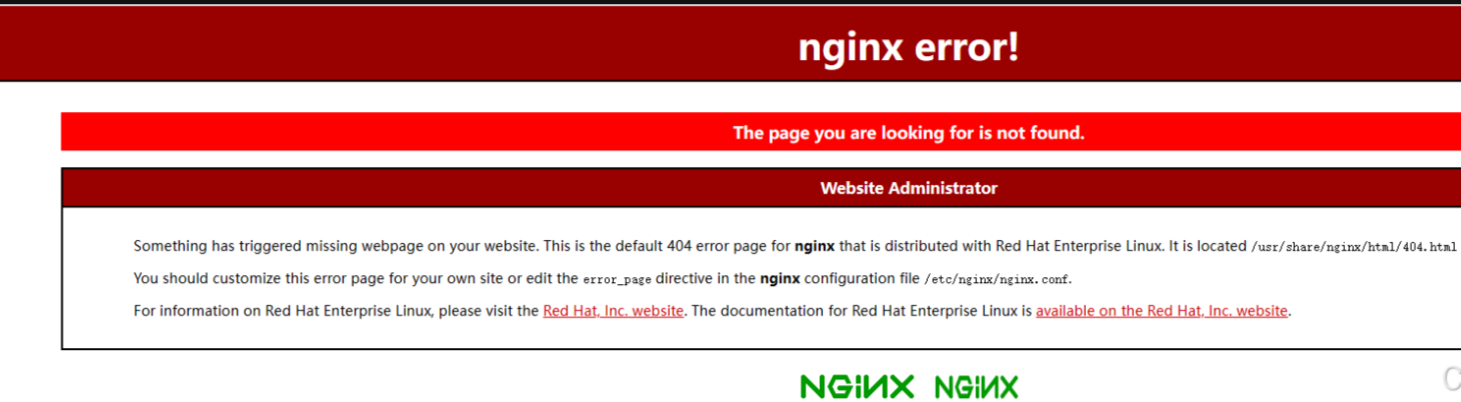
解决过程
配置Nginx以托管Zabbix前端:
编辑或创建一个Nginx配置文件(例如/etc/nginx/conf.d/zabbix.conf),并将内容设置为适合Zabbix的配置。请确保配置中包含正确的PHP处理指令以及指向Zabbix文档根目录的路径。一个基本的Nginx配置示例如下:
server {listen       80;server_name  yourdomain.com;root   /usr/share/zabbix;index  index.php;location / {try_files $uri $uri/ /index.php?$query_string;}location ~ \.php$ {fastcgi_pass unix:/run/php-fpm/www.sock;fastcgi_index index.php;include fastcgi_params;fastcgi_param SCRIPT_FILENAME $document_root$fastcgi_script_name;}
}
开始测试:
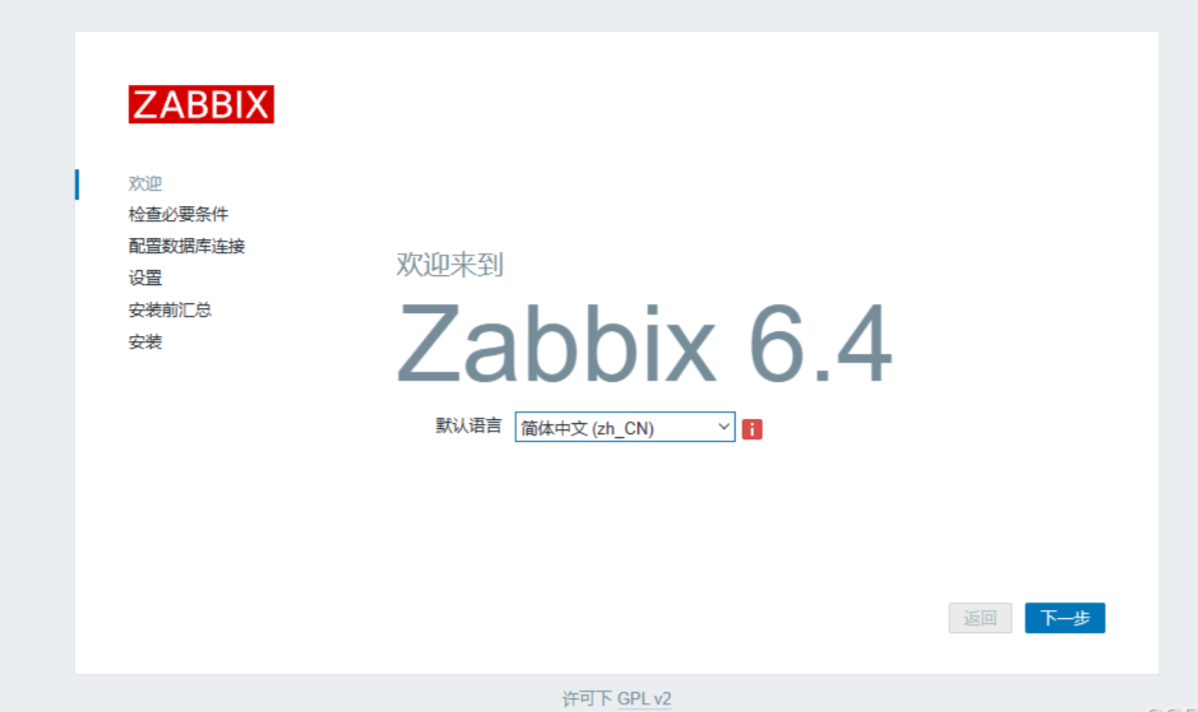
为了确保Zabbix在CentOS Stream 9上的正常运行,需要调整PHP的一些配置参数以满足Zabbix的要求。具体来说,post_max_size、max_execution_time和max_input_time这三个配置项需要设置为至少指定的最小值。
第二步错误解决办法
修改PHP配置
你可以通过编辑PHP的主配置文件来更改这些设置。对于大多数系统,默认的PHP配置文件位于/etc/php.ini。不过,如果你使用的是PHP-FPM,你可能还需要检查并编辑/etc/php-fpm.d/www.conf中的相关设置。以下是具体的步骤:编辑PHP配置文件打开PHP配置文件进行编辑:sudo vim /etc/php.ini
找到或添加以下配置项,并根据需要修改它们的值:post_max_size:设置为至少16M。post_max_size = 16M
max_execution_time:设置为至少300秒。max_execution_time = 300
max_input_time:设置为至少300秒max_input_time = 300
此外,为了确保上传文件大小也足够大,建议同时设置upload_max_filesize为至少16M(这与post_max_size相关联):upload_max_filesize = 16M
记得重启PHP-FPM服务以使更改生效:sudo systemctl restart php-fpm


)


![[蓝桥杯]密文搜索](http://pic.xiahunao.cn/[蓝桥杯]密文搜索)

)